
FAQ
Q1. Windows Driver Download and Installation
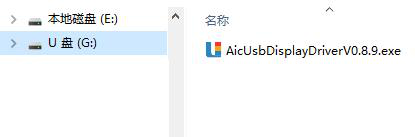
A: After connecting the USB Display device to a PC via USB, if the PC has never had the corresponding driver installed, the system will automatically generate an extra USB drive (virtual disk) containing the required driver installation package. On Windows, open this USB drive and you will find an .exe installation file:
Q2. Linux Driver Download and Installation
Raspberry Pi Environment: Switching to Xorg
In the Raspberry Pi terminal, change the graphics library type using the raspi-config tool:

Steps:
- Run
raspi-configand go to the graphics system configuration item; - Select X11;
- Press ESC to exit the configuration tool;
- Reboot the system;
- After rebooting, run the installation script below again.
Running the Installation Script
In the Raspberry Pi environment, the USB drive described above provides one-click .sh script files:
| Script File | Purpose |
|---|---|
install_for_linux.sh | Install the USB Display driver |
uninstall_for_linux.sh | Uninstall the USB Display driver |
⚠️ Permission Requirements Installing software on Linux requires root user privileges, and running the scripts above likewise requires root. It is recommended to execute them from a terminal command line.
Installation Steps:
- In the USB drive folder view, right-click the
Linuxfolder and select "Open in Terminal";
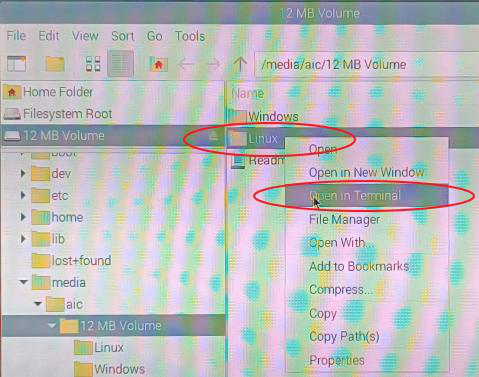
- Run the installation script from the terminal command line:

When installation succeeds, the terminal will display AicUSBDisplay installed successfully.
Unplug and re-plug the USB connection once, and the USB extended display will work normally.
Uninstallation Steps:
To uninstall, open a terminal the same way and run the uninstall script:

Common Issues
| Issue | Troubleshooting |
|---|---|
| No USB drive appears after plugging in the device | Verify the USB cable/port is working; confirm the driver was never installed on this PC before |
| Extended display not showing on Linux | Confirm the system has switched to Xorg (not Xwayland); confirm the USB was re-plugged after installation |
| Permission error when running the installation script | Run the script with sudo or as the root user |
| Extended display behaving abnormally | Uninstall the driver, reinstall it, and re-plug the USB |
Q3. MacOS Driver Download and Installation
Installing the New Version
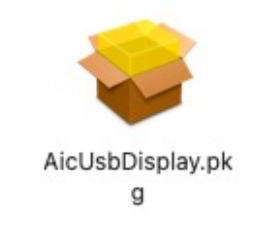
Double-click the AicUsbDisplay.pkg installation file, press Enter to confirm, and complete the installation.
The installation wizard looks like this:
💡 If the installer reports "cannot be opened because it is from an unidentified developer" during installation, right-click the pkg file and choose Open, or allow it under "System Settings → Privacy & Security" and try again.
Usage Instructions
Launching the Application
Find the AicUsbDisplay icon in the Mac Launchpad and click to launch it:
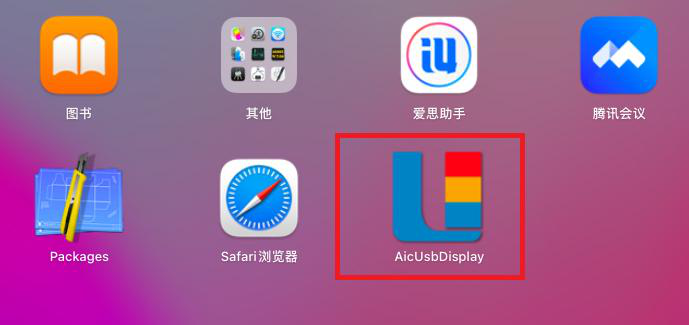
Once launched, a small program icon appears in the menu bar at the top-right corner of the screen:

Accessing Configuration (Screen Recording Permission)
Connect the Mac to the USB secondary display with a USB cable. The first time the secondary display is detected, the system will pop up a permission confirmation window:
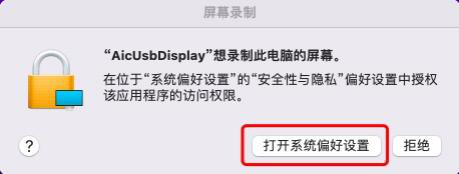
Please enable the Screen Recording access permission for AicUsbDisplay:
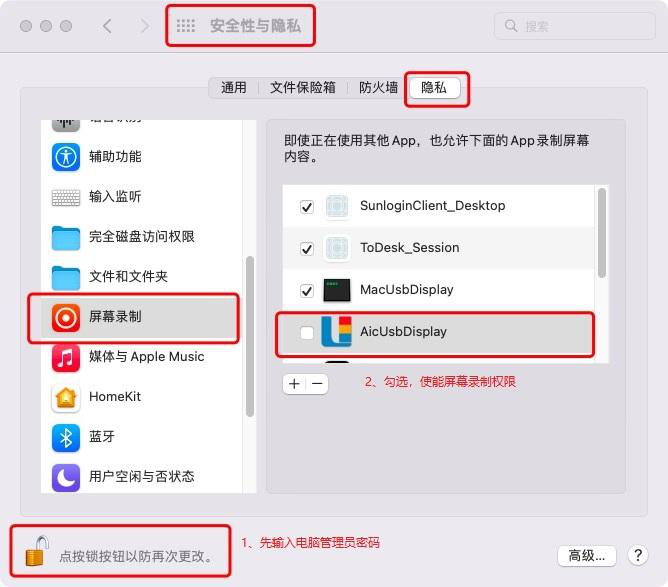
⚠️ If this permission is not enabled, the secondary display may fail to show any image. After enabling it, restart AicUsbDisplay for the permission to take effect.
Screen Arrangement Configuration
In multi-monitor mode, you need to turn off screen mirroring under "System Settings → Displays" before the secondary display can be used as an independent extended screen:
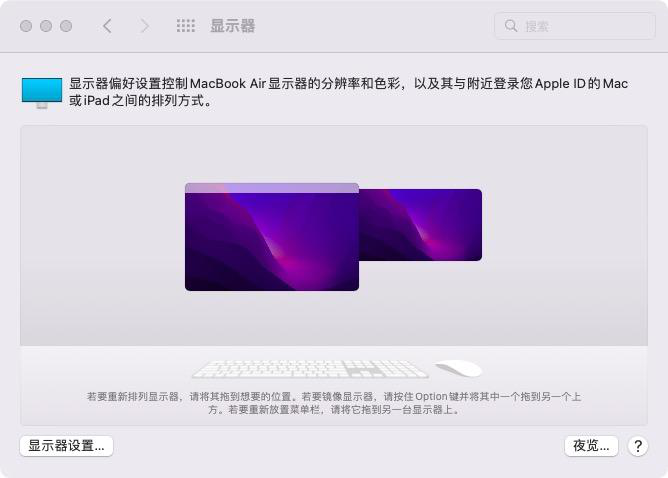
Using the Secondary Display
Once configuration and installation are complete, the USB secondary display can be used normally as an extended screen for the Mac:
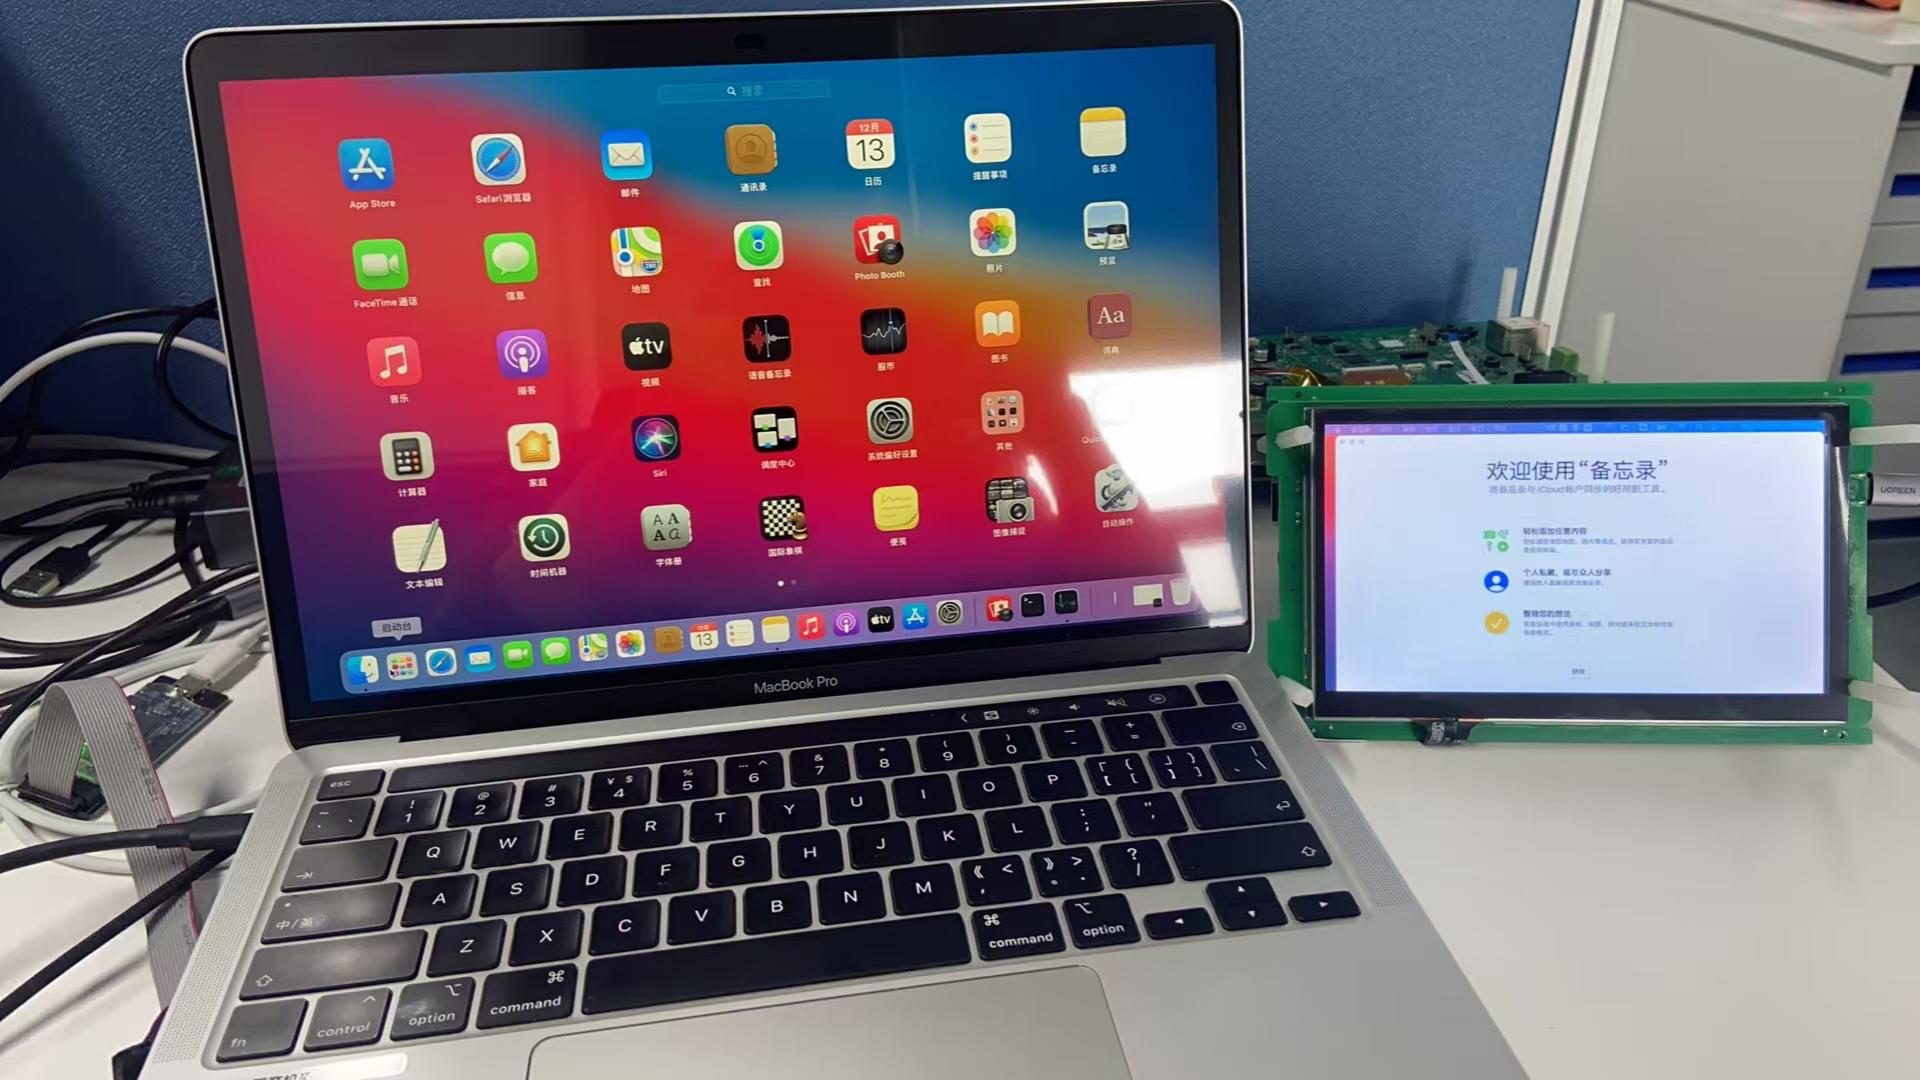
Common Issues
| Issue | Troubleshooting |
|---|---|
| The pkg installer is blocked by the system | Right-click the pkg → Open; or allow it under "System Settings → Privacy & Security" |
| Secondary display is black / shows no image | Check whether the "Screen Recording" permission is enabled, and restart AicUsbDisplay |
| Secondary display can only mirror, cannot extend | Turn off screen mirroring under "System Settings → Displays" |
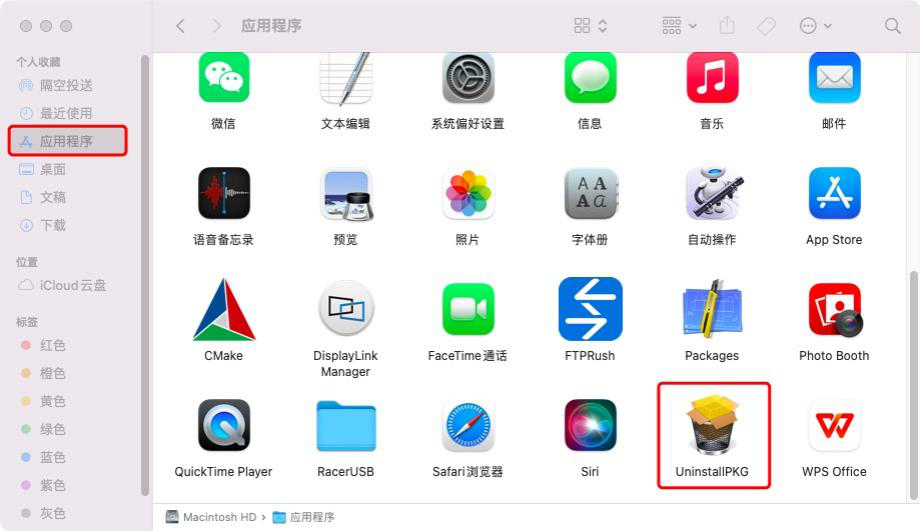
| Driver leftovers after uninstalling | Use UninstallPKG to completely remove AicUsbDisplay.pkg, then restart the Mac |
Q4. Why does the Windows driver update fail?
A: Before updating the Windows driver, uninstall the old driver in Device Manager.
Q5. Why does the Windows driver installation fail?
A: If driver installation fails, update the certificate: GlobalSign Code Signing Root R45.cer.
Q6. Installing the deb driver package on Linux fails — how to fix it?
A: When installing the driver on Linux, make sure the software repository environment is working properly and that commands such as dpkg -i are supported. For details, search for a solution based on the error message.
Q7. The USB secondary display shows no response when plugged in, or exhibits issues such as "screen flickering" or "erratic touch input". What should I do?
A: Please check the power supply of the secondary display. Additional notes:
USB-C (PD protocol): This is the ideal power solution. A USB-C port that supports the PD (Power Delivery) protocol can deliver a stable output of 5V/3A (15W) or even higher. Ports such as USB 2.0 (5V/0.5A) and USB 3.0 (5V/0.9A) can only drive small secondary displays, and turning the brightness up to maximum can easily trigger the mainboard's current-limit protection, causing the device to restart.
Q8. The driver loaded successfully and the power supply is sufficient (5V/3A or higher), but the screen still does not light up. What else could be the cause?
A: Please check the kernel's USB speed configuration mode and make sure High-speed is supported — full-speed bandwidth is far from sufficient for image data transmission, so no image can be displayed.
Q9. I have tried all the steps above and the screen still does not light up. Are there any other possibilities?
A: This relates to the Linux system timing requirements. Make sure the graphics stack is Xorg — mechanically, the screen must be connected for Xorg to detect it before it will work. The ideal sequence is:
Driver loads at boot → connect and power the display → Xorg starts & the render service starts.
(After optimization, the display can be connected before the device starts, unaffected by the connection time — in other words, connecting it after the system is up also works, as long as the secondary display driver is loaded in the early kernel stage.)
Q7. Touch anomalies may occur the first time a touch-enabled secondary display is used on Windows — touch calibration is required
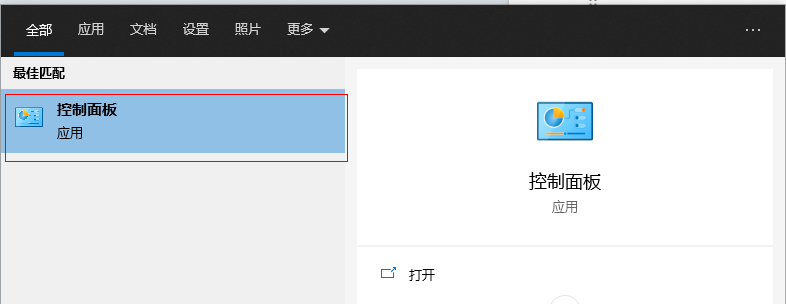
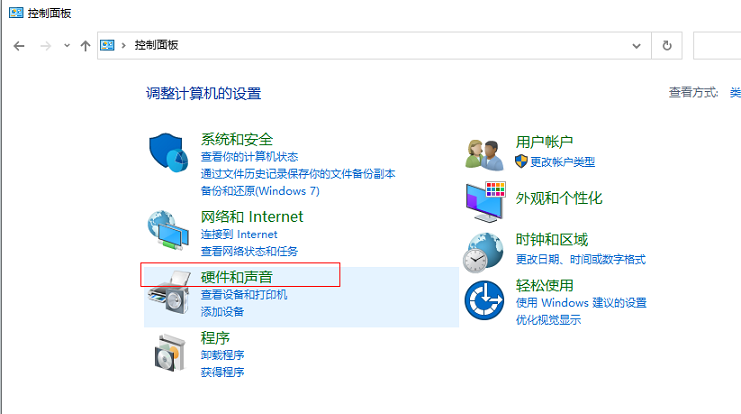
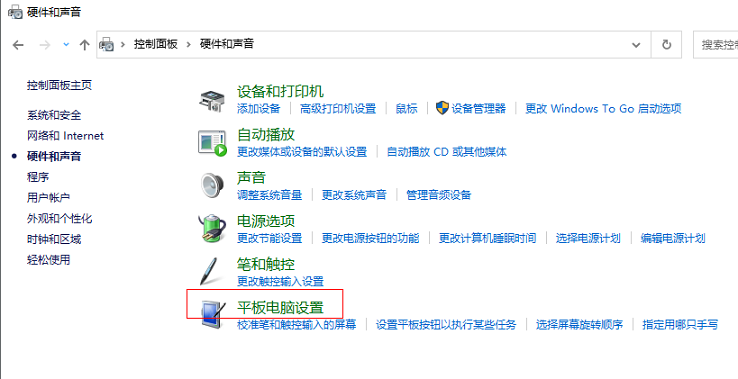
A: When touch is enabled on a USB secondary display under Windows, touch events are mapped to the primary monitor by default. Before using touch on the secondary display for the first time, perform a touch calibration to bind touch input to the USB secondary display. Open "Start menu → Control Panel → Hardware and Sound → Tablet PC Settings" in order.
- Search for Control Panel in the Windows Start menu and click to open it.
2. On the Control Panel home page, click **Hardware and Sound**.
3. On the "Hardware and Sound" page, find and click **Tablet PC Settings**.
4. In the "Tablet PC Settings" dialog, click the **Setup** button (under the **Display** tab, in the "Configure" section) to start the touch screen calibration process.
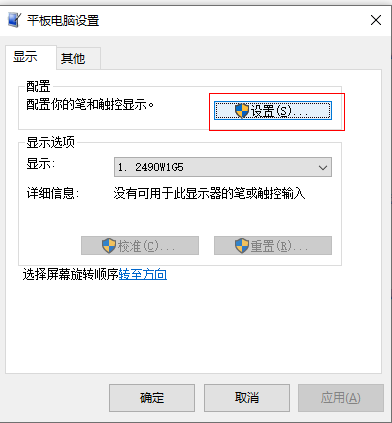
5. Once calibration starts, the system will display a full-screen calibration interface with the following prompt:
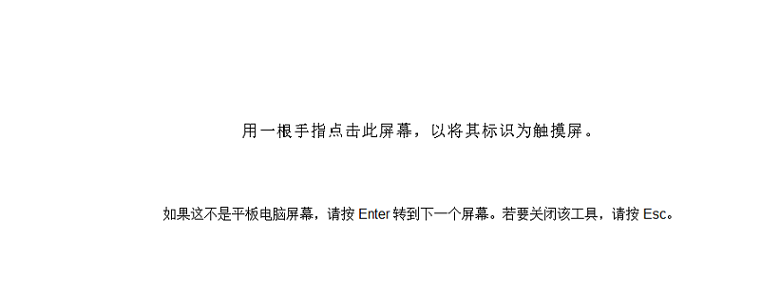
6. If the calibration interface appears on the primary screen, press **Enter** to switch it to the USB secondary display. Follow the on-screen prompts and **tap the screen** on the secondary display with your finger (usually crosshair marks on a white background) until the calibration interface closes automatically. When calibration is complete, choose **Yes** in the "Save calibration data?" prompt.